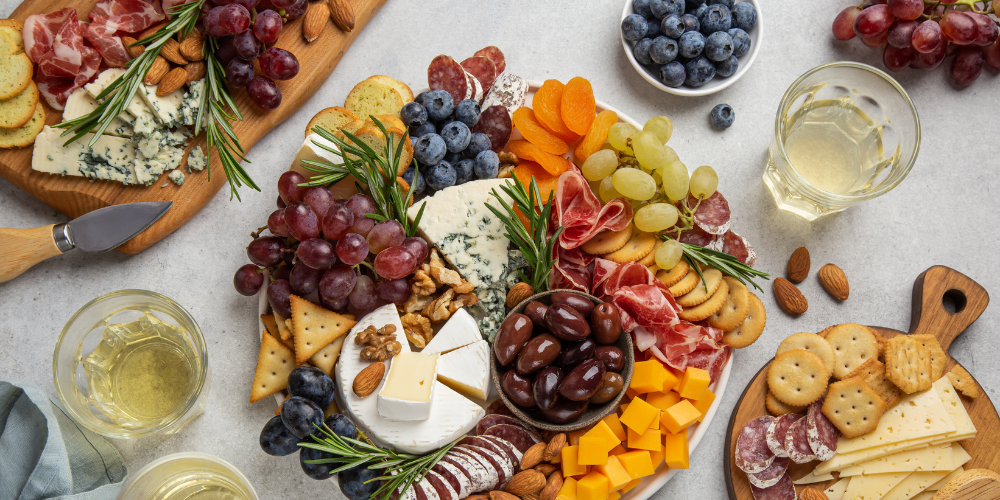
Creating a stunning and delicious cheese board is an easy and elegant way to impress guests, whether you’re hosting a dinner party, a casual gathering, or simply treating yourself. A well-balanced cheese board features a variety of flavours, textures, and colours, making it as visually appealing as it is tasty. Follow this step-by-step guide to craft the ultimate cheese board that will be the highlight of any event.
What You’ll Need:
- A large serving board or a few smaller boards
- Cheese knives
- Small bowls and plates
- 2–4 types of cheese
- Crackers and bread
- A mix of accompaniments (fruits, nuts, meats, spreads, etc.)

Step 1: Choose the Right Board & Utensils for your Cheese Board
Start with a solid foundation. A wooden or marble cheese board works best for presentation. If you’re hosting a larger gathering, consider using multiple boards to spread out the elements. Have dedicated cheese knives for each type of cheese to keep flavors distinct.
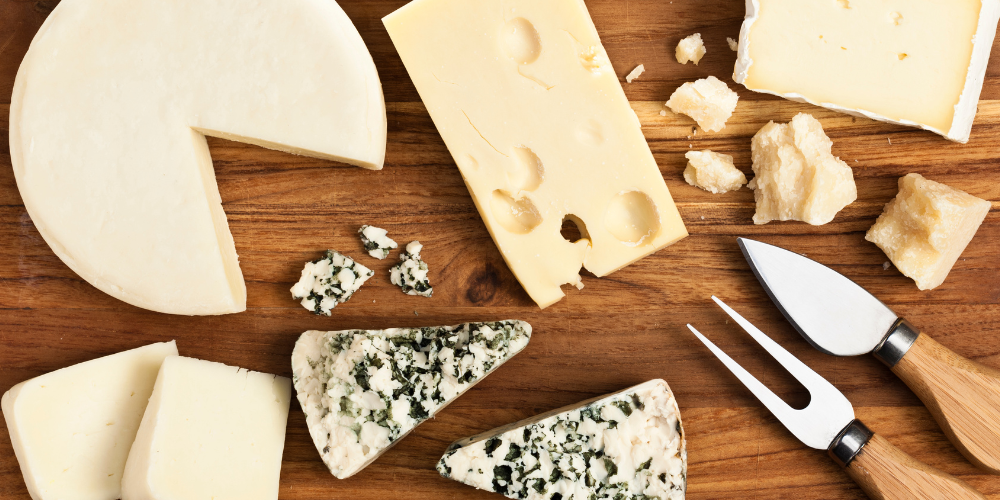
Step 2: Select Your Cheeses
Variety is key! Aim for at least three different cheeses to provide a mix of flavors and textures:
- Soft & Creamy: Brie, Camembert, or goat cheese
- Hard & Aged: Cheddar, Gruyère, or Manchego
- Bold & Funky: Blue cheese, Gorgonzola, or Roquefort
Pro Tips:
- Serve cheeses at room temperature for the best flavor and texture.
- If your cheese board will be passed around, pre-slice some of the cheese for easy serving.

Step 3: Add Crackers & Bread
Provide a mix of textures with different cracker and bread options:
- Crackers: Water crackers, oat crackers, or seeded crackers (great gluten-free option!)
- Bread: Sliced baguette, sourdough, or whole-grain bread
Avoid flavored crackers, as they can overpower the delicate taste of the cheeses.
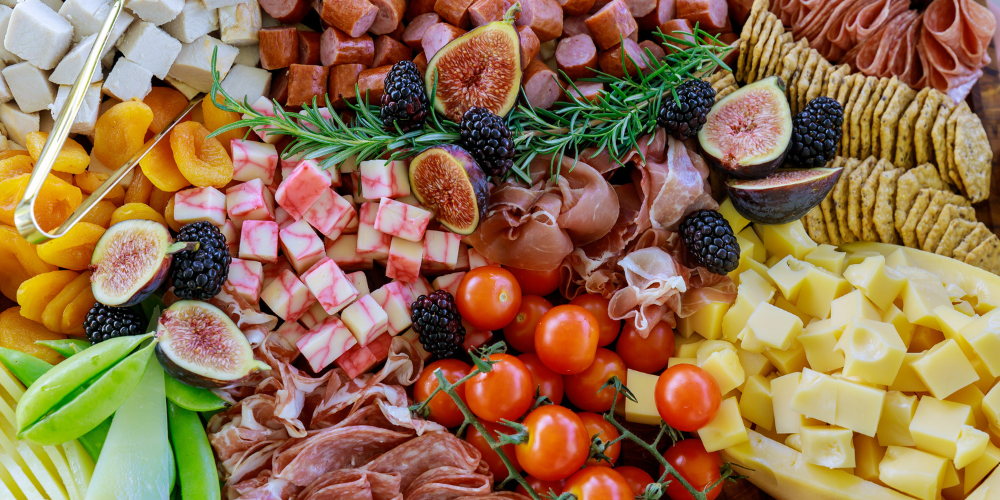
Step 4: Include Tasty Accompaniments
Adding accompaniments enhances the board’s flavors, textures, and colors. Consider the following:
Dips & Spreads:
- Hummus, pesto, or a sundried tomato dip
- Honey or fruit preserves for a touch of sweetness
Cured Meats:
- Prosciutto, salami, or chorizo for a savory element
Pickled & Marinated Additions:
- Olives, pickles, or marinated artichokes add a zesty contrast
Sweet Elements:
- Dried fruits (apricots, figs, dates)
- Grapes, berries, or sliced apples and pears
Crunchy & Fresh Elements:
- Mixed nuts like almonds, walnuts, or pecans
- Fresh veggies like carrot sticks or cucumber slices as a palate cleanser
Step 5: Assemble Your Cheese Board
Now comes the fun part—arranging everything! Here’s the best approach:
- Start with the largest items (cheese wheels, bowls of dip, or clusters of grapes).
- Place meats and crackers around the cheese.
- Fill in the gaps with fruits, nuts, and smaller accompaniments.
- Add the finishing touches with garnishes like fresh herbs (rosemary, thyme, or basil).
Presentation Tip:
Use different shapes, colors, and heights to create visual appeal. Stack crackers in small piles, fold meats for a textured look, and let fruit spill naturally onto the board.
Expert Tips for the Perfect Cheese Board
A well-crafted cheese board is not only delicious but also a conversation starter. Whether you’re creating one for a festive occasion or a cozy night in, the key is balance—offering a mix of flavours, textures, and colours. With this step-by-step guide, you’ll be able to assemble the perfect cheese board that will leave a lasting impression on your guests.
Ready to create your masterpiece? Gather your ingredients, follow these simple steps, and enjoy the perfect cheese board experience!